
Author: Steve Hericks
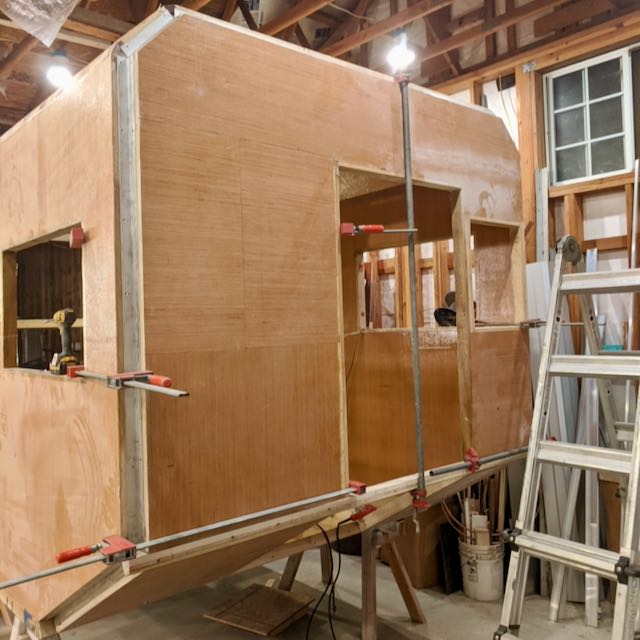
When I built the camper, I had a new design and ideas all in my head. Getting the first wall built and completing the fiberglass process was hugely satisfying. Once the walls, floor and a roof were assembled into a box the dream camper was feeling real. It was very exciting.
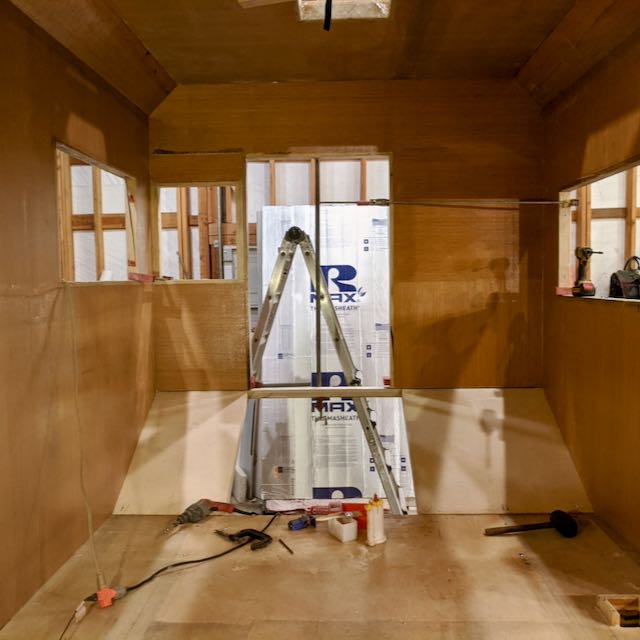
Fast forward to present day nearly 3 years after we launched Maximus onto the road and I’m having to tear open the back wall. Digging into the wall revealed what happened and where it started. This is not exciting at all. In fact, it is disheartening maybe even maddening. I had waited to fully waterproof some exterior corners because they were designed as a wire channel. Unsure if I all my wiring needs were completed, I never went back and applied spray foam in the wire channels.
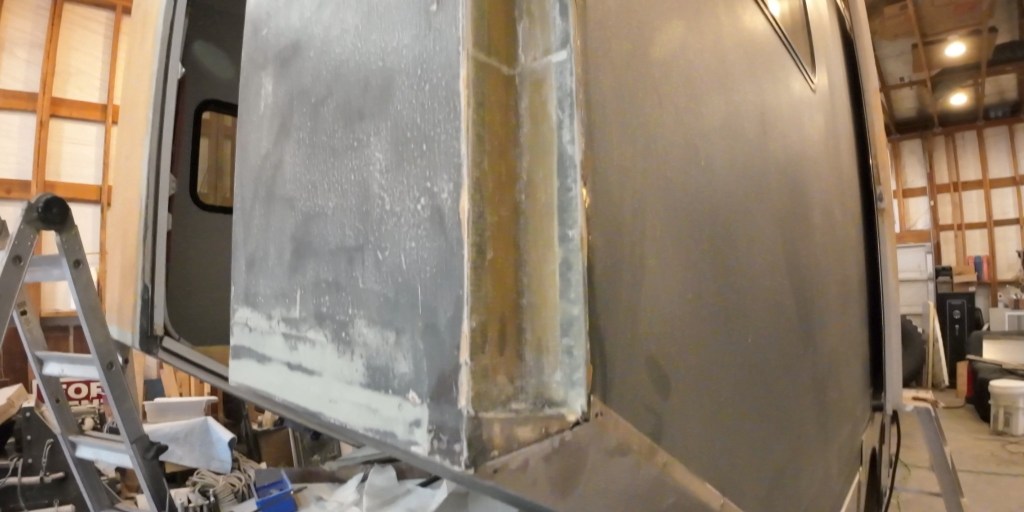
Now the back wall has some serious water intrusion issues because it wasn’t waterproofed sufficiently. We didn’t know how bad it was until the wall plywood is torn off. The evidence of damage is present in several places but is most severe on the back wall, around the spare tire mount. A year ago, when rotating tires, I found a complete rupture THROUGH the wall under the spare tire.
I won’t spoil the cause of this surprise but it was a doozy and is in our latest repair video.
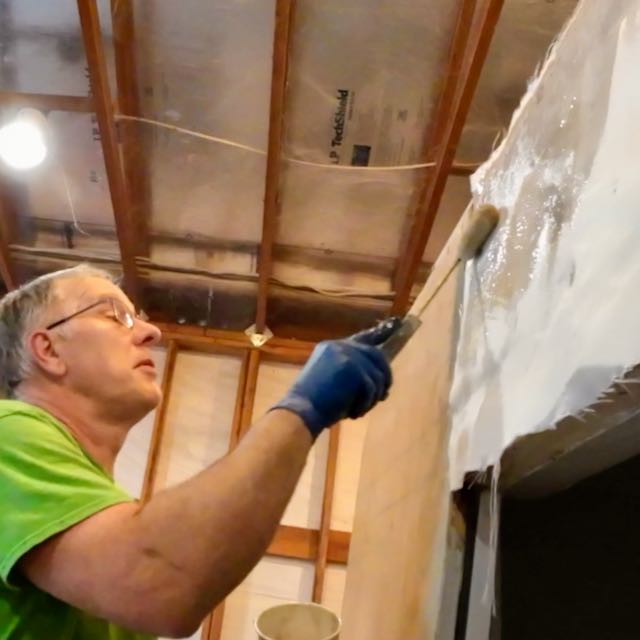
What I will share here is the my fiberglass over wood process. It’s an outline (companion to the video) intended for anyone looking to take up a fiberglass project of their own.
Wall Repair Process
- Remove aluminum corner covers
- Remove damaged face material (plywood and fiberglass) to find solid plywood
- Square cut damaged area back to solid plywood
- Sand interior surface to remove uneven protrusions (staples and dried glue)
- Cut/fit new piece of 5mm plywood
- Apply glue the wall and back of plywood
- Staple the plywood every 4″ where poplar lumber underlies
- Roll a heavy resin coat on the new plywood
- Fillet interior corners and level seams with body putty and thickened resin
- Sand/profile fillers
- Add 2 layers of 6 oz cloth tape to interior corners
- Cover flat surfaces onto adjoining areas with 6 oz cloth
- Sand all surfaces smooth
- Fill minor depressions with body or spot putty
- Sand putty smooth
- Roll on bonding primer (paint is not able to bond directly to fiberglass)
- Roll/brush a base coat
- Spatter on a texture coat (use a drywall texture gun with fine custom tip and paint)
Install Panel Bridge/Corner
To prevent the recurrence of water intrusion, a full waterproofing treatment that should have been done at the outset, now needs to be done. Instead of using spray foam inside the corner cavity, I elected to apply fiberglass to waterproof and reinforce the panel edges together. These corners are vertical and overhead, complicating the process. On the back wall, I removed the aluminum angle because it had some corrosion, and replaced it with a double layer of 1708. This method is high strength. On the bunk floor, the aluminum was in good condition so could be left in place but fiberglass does not adhere well to aluminum nor does it follow the sharp contours of the edges. I added body putty to fill the step on the edge of the angle and overlayed the joint with a single layer of 1708. This method is more about waterproofing and less about reinforcement because the remaining aluminum still strengthens the joint.
- Remove the aluminum corner covers
- (Either) Remove the aluminum angle connector and add radius compound to the interior corner
- (Or) Add fairing compound to the edges of the aluminum angle for a smooth transition.
- Grind a smooth fillet into the radius compound and sand panel edges clean and smooth
- Apply resin to the panel edges
- Pre-saturate short sections (10″-16″) of 6″ wide 1708 biaxial mat reinforcement
- Apply pieces of reinforcement to the joint with partial or fully overlapping ends
- Trim hardened reinforcement that extends beyond the panel edge
- Resin coat the entire cut edge to ensure wood edges exposed during trimming are waterproof

This drawing represents the original construction. The walls were individually resin coated and had a 6oz cloth already applied. Constructing the interior corner occurred after the shell was assembled. The repair varied by one difference. Since the walls were already joined, the putty and 2 layers of corner strips were applied. The last step was layering on the full wall covering on the newly installed plywood and overlap it with the corner strips.
Obviously, this is not meant as a tutorial however, feel free to drop a comment if you have questions regarding fiberglass work.

Video
If you enjoy personal travel stories and especially camping, follow this blog by entering your email below. You can also follow us on Instagram @WorkingOnExploring or @Maximus.4×4.camper, and subscribe to our WorkingOnExploring YouTube Channel on for our build and trip clips. Good luck on your own exploring and we’ll see you from the road somewhere soon!
Follow WorkingOnExploring travels and ongoing #SundayStills photo Challenge Posts
Delivered directly to your email inbox.
